Mount Shasta Hike and Timelapse
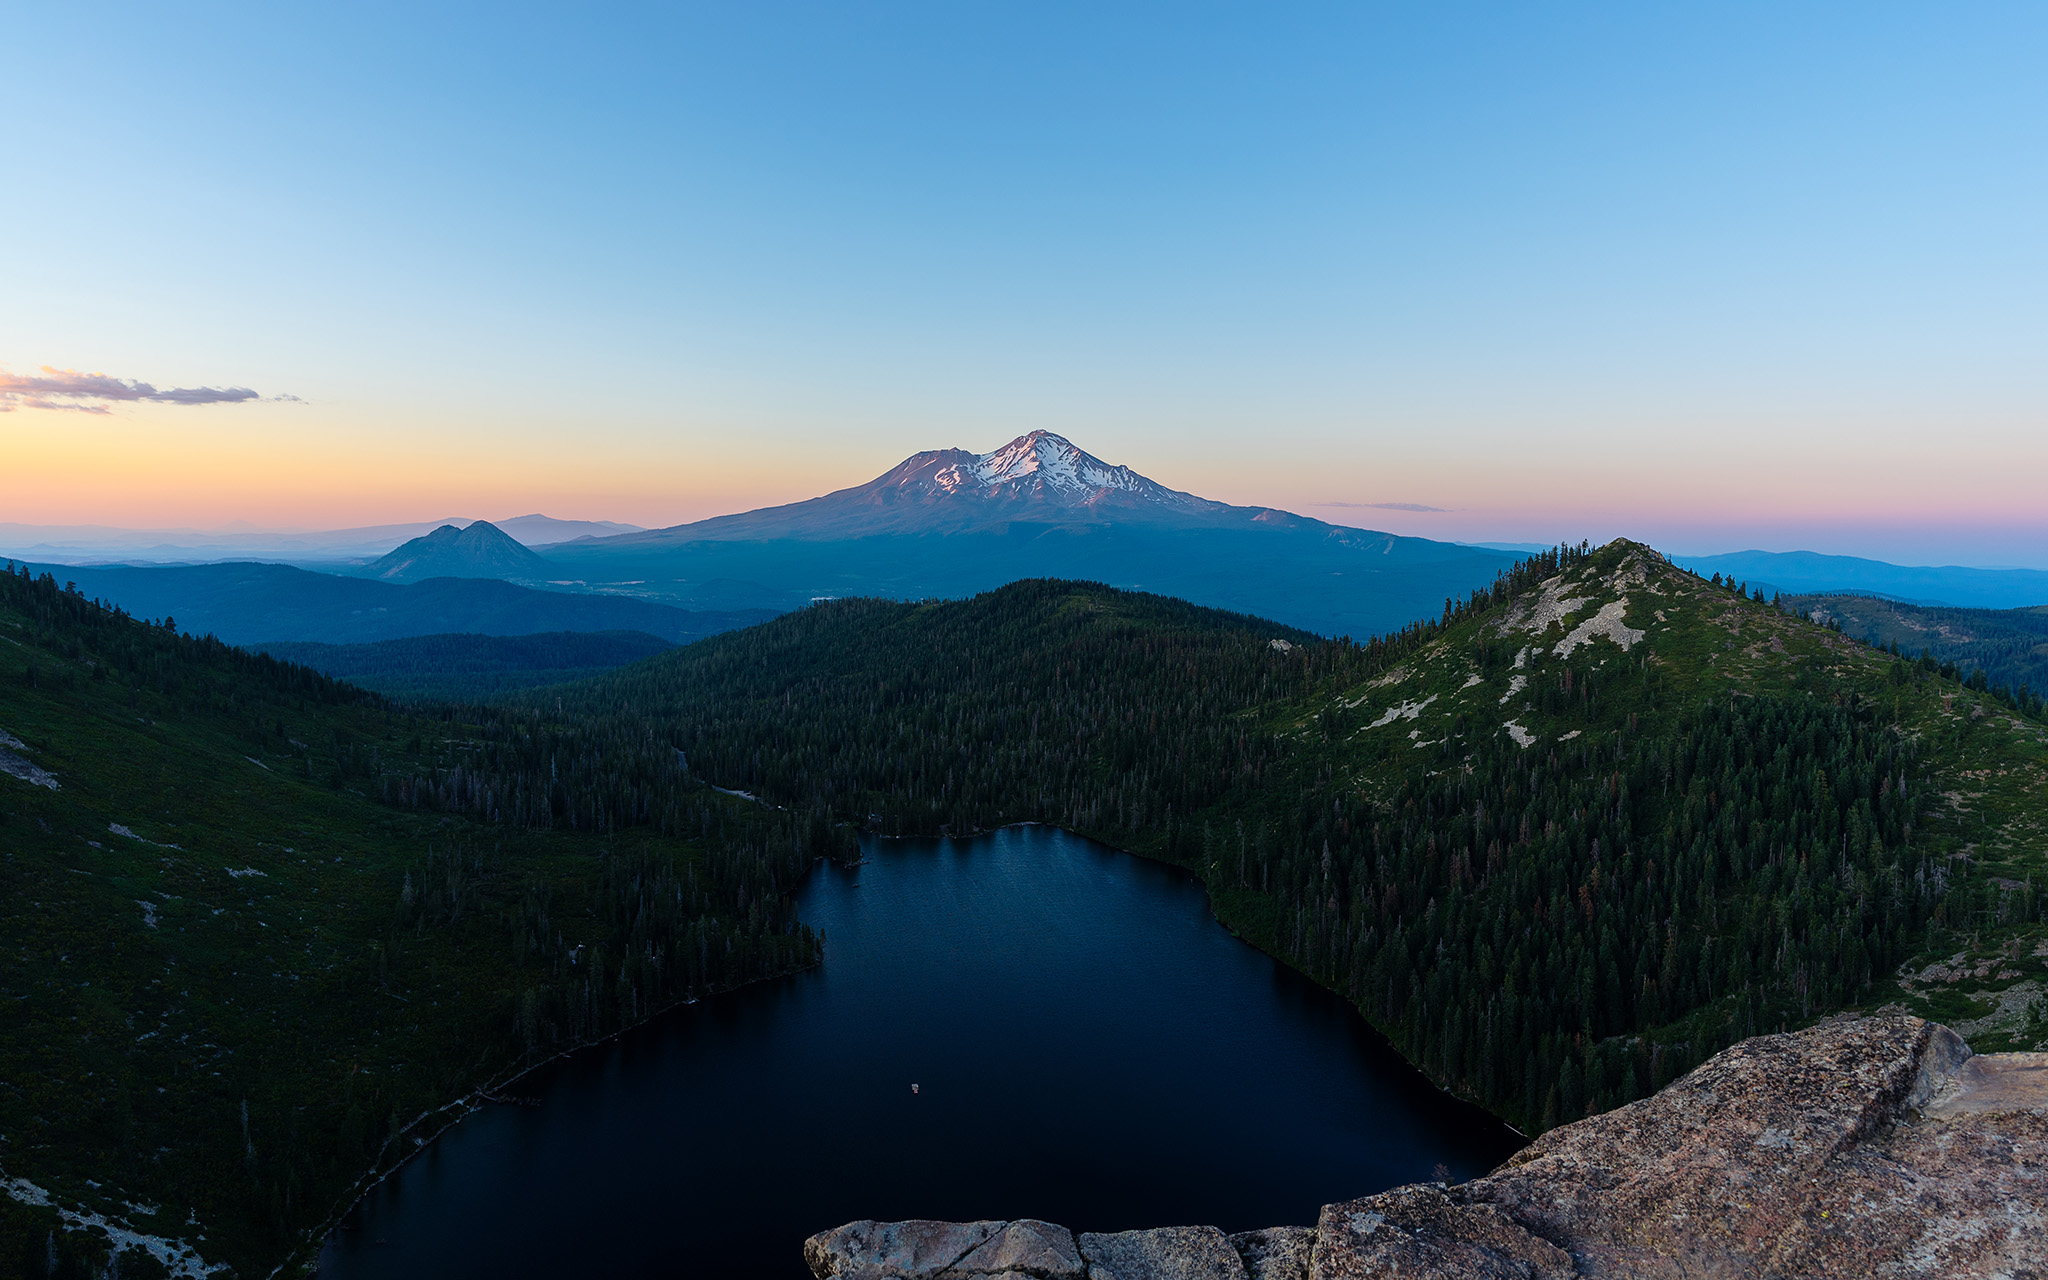
Mt Shasta Sunset | Sony Alpha a7 II + 16-35mm f/2.8 GM @ 20mm, f/11, ISO 100, 1/4 sec - still frame from my timelapse
This past summer, my family took a couple of trips to up to Northern California to hike and see the southern part of the Cascades. On this trip we spent our time in the shadow of Mt Shasta hiking in the mountains around Castle and Heart Lake. It is such a beautiful location, and once the trail came out of the dense forest area into the opening, the views were quite stunning too. Aside from the glacial lakes, this location is filled with lovely trees (mostly pine and fir) and granite rocks.

We arrived at the parking lot and started out hike around 4pm. In the photo at the top of this page, you can see the road on the left leading towards the lake; that is where the parking lot is. For this hike, I filled my Osprey hiking bag with my camera gear along with some snacks, water, extra layers, and a headlamp. In addition to my camera and lenses, I took two tripods and my camera slider so that I could set up a motion controlled timelapse at the peak. The total round-trip hike was around 3 or so miles with about 800 to 1000 ft of elevation gain. We all took our time and enjoyed the scenery on the hike. And even with all the weight I was carrying up, I still thoroughly enjoyed the hike. Overall, the views that came with this hike made it very rewarding.


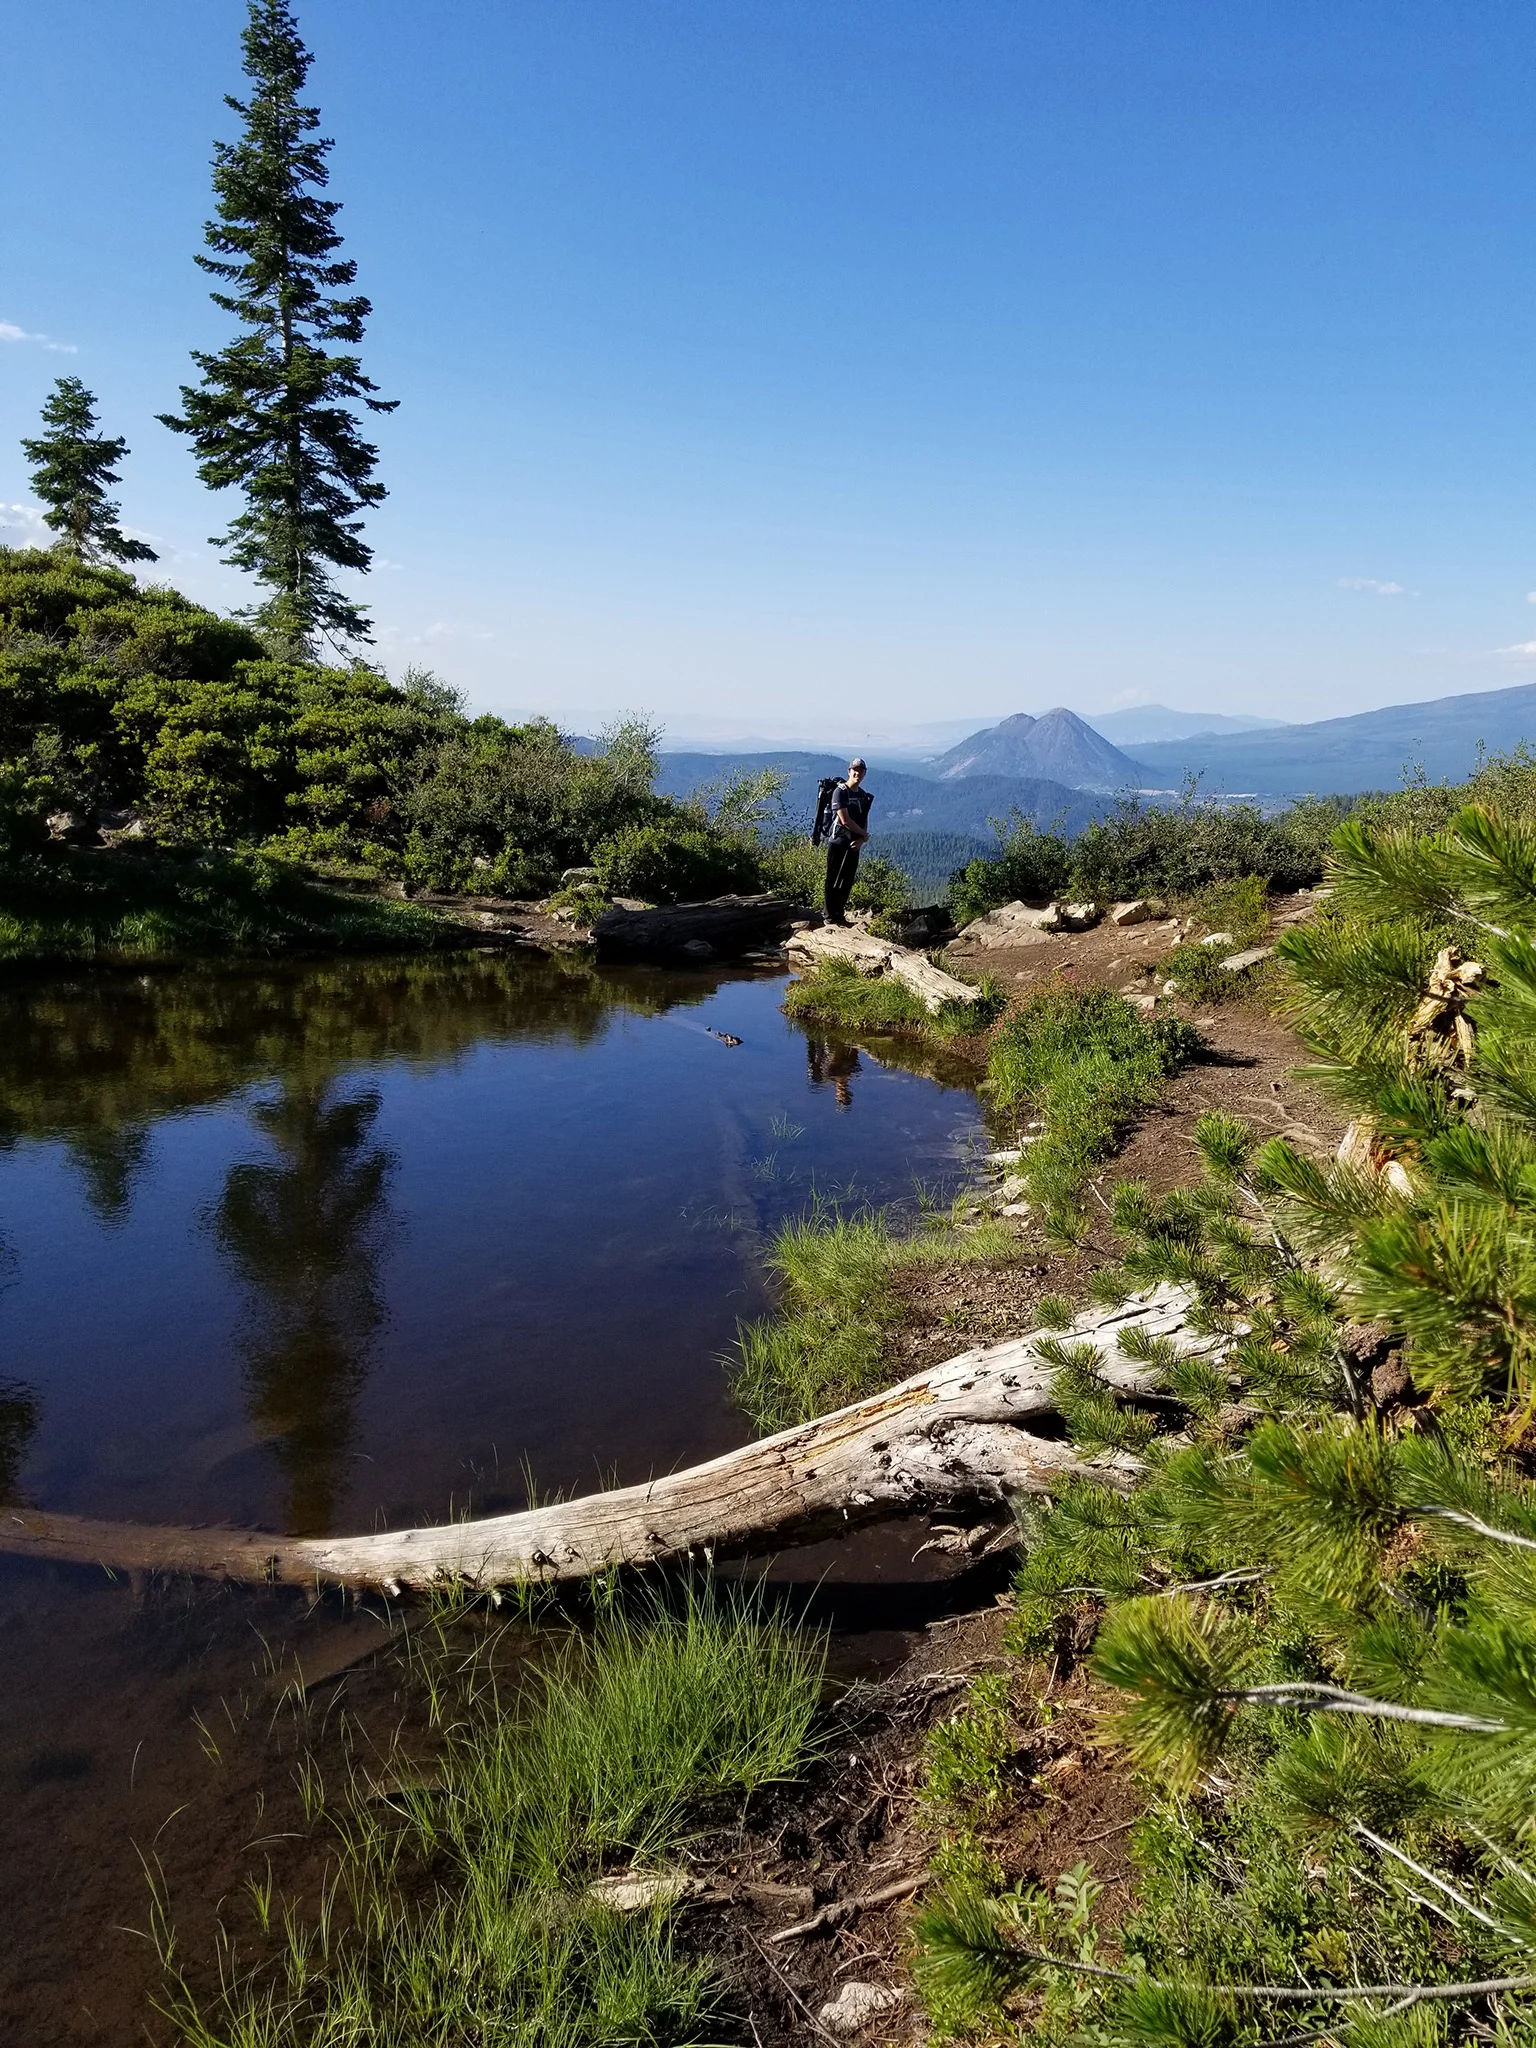
We reached the top peak with over an hour and a half to spare before sunset. The views were indeed stunning at the top, but it was also the worst time to have a stomach ache. Luckily, after a little bit of rest, it went away. Then, I set up my slider to do a slow push shot while moving against the cliff’s edge in the foreground. It was a little tricky setting up my slider on two tripods in a slope without much room to work with, but after many adjustments, I got it to work out well. The reason why I had my slider on a slope was so that the slider itself would not be in the photo as I was using a pretty wide angle lens. And since my camera was facing parallel to the direction that it was moving, the front part of the slider would be in the frame if the slider was not on an incline. Also, that funny looking thing on top of my camera is a power bank to power my camera as my camera’s battery life is not the greatest. Once everything was setup, I just let the motion control and camera do its thing while I took in the views and colors of the sunset. It was a little windy up at the peak as the sun set, but luckily my timelapse rig remained steady enough to not introduce any unwanted motion blur. In case you are wondering, my slider and motion control is made by Syrp. By using their mobile application, it makes it really easy to setup the interval and the keyframes for the movement for the timelapse.

Setting up my timelapse rig overlooking Mount Shasta.
I would say that I am not a very outgoing person; most of the time when I am doing photography at locations like this, I normally keep to myself and try not to bother anyone else that might be there. On this evening (with the help of my parents starting a conversation), I met some friendly people at this peak while taking in the sunset. So shoutout to Lucas and Molly and Katie if you happen to be reading this. And to Lucas who wanted to see the final timelapse video (and anyone else), I posted the video on my Facebook page. In addition, this timelapse video is going to be a part of a video that I’m still in the middle of editing spanning across some beautiful locations that I’ve traveled to in California over the last year and a half. Hopefully, I will be able to release this video by the end of the year to my YouTube channel.
As for editing the timelapse, I used Lightroom Classic for the exposure and color adjustments along with LRTimelapse to sync the settings and deflicker the timelapse sequence. After I exported the photos from Lightroom, I created a Photoshop action and then wrote a custom script to batch edit the photos in Photoshop. See in Lightroom, it is easy to copy your settings across multiple photos, but in Photoshop, there is no good way to do so. So, it was very nice to have my script automatically do that for me while I could occupy myself doing something else. The additional processing in Photoshop was mainly to create better contrast in the midtones of the image. Then, the photos were all combined in After Effects to create the final timelapse. Overall, I am pleased with how the final timelapse turned out; however, I wish there were some clouds in the sky so that the timelapse could also capture the motion in the clouds.

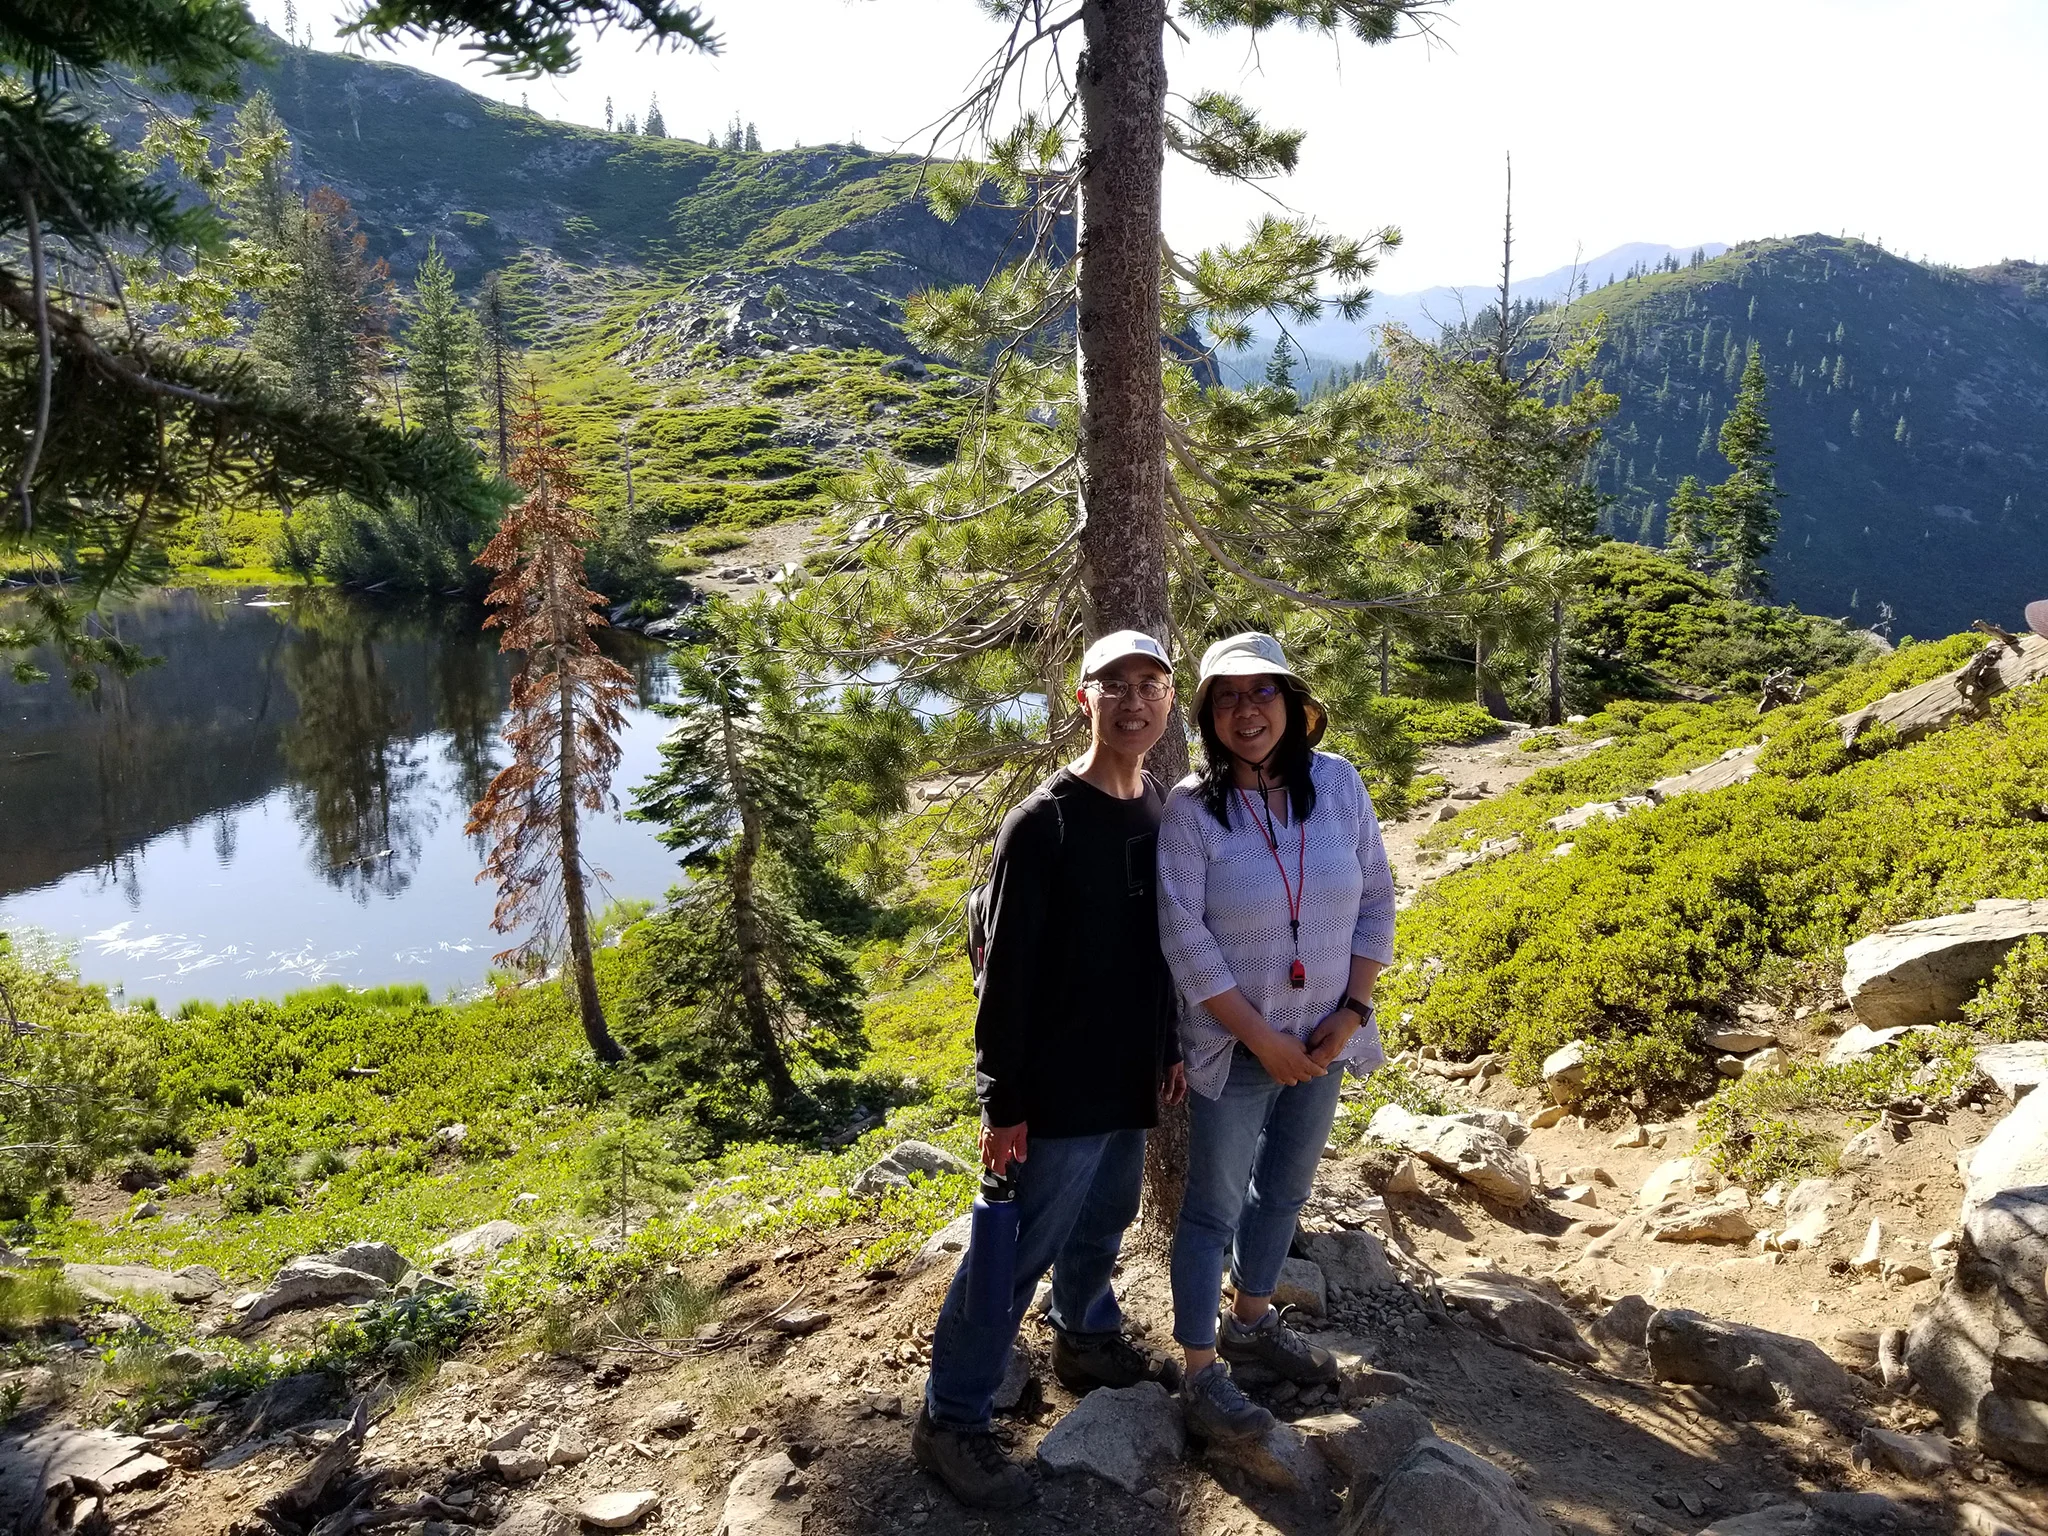
Here are a couple of family photos that we took while on our hike. After sunset, we headed back down in the dark and got some rest back at our lodge. The next morning, we woke up for a morning hike. It was nice to catch the warm morning heat in the mountain air again before heading back home. On a side note, if you ever come up to Mount Shasta, you should definitely check out the Black Bear Diner. After visiting Black Bear Diner in Redding a couple times on a previous trip, our family decided to stop by Black Bear Diner for lunch before we left the area. I had the Parmesan Sourdough Cheeseburger which was quite delicious. And this Black Bear Diner in Mount Shasta is the original one. Also, I want to thank my dad for taking all the photos that I am in.

Sunrise in Mount Shasta with the Serengetee Chase Views pin